Effortless Figma to Webflow Migration in 10 minutes [+Free plugin]


Key Takeaways
Is it challenging to convert your existing Figma design into a live website? Then, you may be overwhelmed with so many tutorials without a clear solution.
No worries!
You don't have to spend extra hours in learning or experimenting. We've covered the most straightforward methods to migrate your static Figma design into an interactive Webflow website.
In this guide, we'll reveal how to use Figma to Webflow tools and plugins seamlessly transition without the hassle of a heavy learning curve. Let's get started.
Does Figma to Webflow Conversion Work?
While you want to save a ton of time from building design from scratch, exporting Figma design to Webflow is a great option –obviously, it works!
Just get your existing Figma design on screen. Then copy it directly to the Webflow with a standard pre-built layout and elements– it's as simple as that.
You can follow manual or automation processes to migrate Figma into Webflow. These two are:
1. Using UI Kit(manually): Complex projects requiring custom design and control.
2. Using Figma to Webflow Plugin (Automation): Quickly building basic website structure.
Get a quick guide on how to become a Webflow developer.
Method 1: Step-by-Step Guide on Figma to Webflow Migration Using UI Starter Kit
In the beginners' guide, you'll learn from the design in Figma, export the design to Webflow, and then successfully convert it into a real Website. Let's dive into the details.
Step 1: Open Figma

First, start by opening Figma in your browser. Then, go to the 'community tab' option on the right toolbar.
Step 2: Select UI Starter Kit

Search 'Webflow', and you'll see many resources related to Webflow. Select 'UI starter kit'.
Now, press duplicate, and a page will appear with different components required for design.
Step 3: Search for landify kit

Again, go to the community tab and search 'landify' as before. Here, select 'landify page UI kit.' This tool will help you to convert high-fidelity design into Webflow.
Step 4: Start design in Figma

Go to the Figma' Draft' tab. Start a Blank Canvas. Rename the draft from Figma to Webflow.
Start with the UI kit page and copy the Pre-built layout. Paste it in a draft page opened just before. Next, open the UI kit page and Select block.
Pro tips: A pre-built layout is a Webflow guideline for creating a new design.
Step 5: Create a new artboard

Open the Figma file draft again, and create a new artboard beside the previous layout. The artboard will be 1440 pixels wide. Height can be varied.
Step 6: Import Figma elements from the Landify UI kit

You'll follow the prebuilt layout per the Webflow guideline at this stage. An, just designusingn the new framework you've builn.
- Import navigation: Go to Landify UI kit and select a standard navigation. Copy and paste it into a new framework. Drag the navigation option to the correct position.
Pro tips: Delete unwanted navigation elements like the Google Play Store option.
- Import hero element: Import all the hero elements below the navigation option. Ensure all components are grouped by pressing Command+G or Ctrl+G on the keyboard.
Select all elements again, right-click, and press "Use Mask". Then, all required components from the Landify UI kit will be imported using the above process.
Step 7: Add complex gradient

To add some juicy look, create a new tab and search for “Complex gradient LS graphics”. Select the preferred gradient and copy the image.
Create a rectangle in the prepared file where you want to add gradients. Now, Paste the gradient with Command+V. Make some adjustments.
Step 8: Preparation for Figma Design Export to Webflow
Now, all are ready to export to Webflow. But, here, the element you want to be in the image and illustration should be separate. Double-click on the component and place the text outside of the group.
Step 9: Export design to Webflow

Go to the right sidebar tool and scroll to the bottom to get Export options. Click on the “+” icon and select the jpeg format.
Now, go to the menu bar on the top left bar tool. Then, select file>Export. Figma has now saved all exported elements into a folder. Get the folder in the right toolbar and select Export. This file is saved as a Zip File.
Step 10: Start a new project on Webflow

Go to Webflow.com and create a new project. Select the ‘Asset’ icon from the left sidebar tool. Go back to the Zip file. Drag and drop all elements into the Asset manager zone.
Step 11: Repeat the Figma design
Go to the Add Elements icon (+) and select Layout. A prebuilt layout and other elements will appear on the plugin modal window.
- Setup navigation: Now, click on 'Sticky Nav’. Then, click the Nav icon settings option and choose the navigator image. Ensure the High Dpi and adjust the size (100 pixels)
Copy and paste from the Figma to web flow draft file you've prepared before. Now, adjust the background color, size, bottom, and others to your preference.
- Setup hero section: Go to Add element>Layout>hero overlay from the plugin modal window. Simply drag it and place it on the screen.
Step 12: Customize the design

After positioning, click on the background. Then, select the styling icon from the top right bar. Scroll down to the Image & gradient option. Delete the rgba (0,0,0,0.6) option from here.
Now, change the image by selecting the image from the asset manager. Get the navigator option and now jump to ‘Centered Container’.
Click on the position from the right bar. Change it from Static to Relative.
Next, select color styles and button styling and create a swatch card. Adjust the color, position, and sizes according to your needs. You may add animation to a custom template available on the Webflow library.
Note: Continue to add sections and elements within the same process.
Step 13: Launch your website
You've now got an initial Webflow site to launch. You can update the design, elements, or other settings anytime after launch. So, go to live with confidence.
Method 2: Figma to Webflow Conversion Using Plugin
This process is just about copy and paste! How? Transfer design directly to Webflow using these simple steps.
Step 1: Run the Figma to Webflow Plugin

Go to the Figma ‘Community’ tab and search for the Figma to Webflow plugin [HTML, CSS and Website] launched by Webflow labs. Press the 'Try it Out’ button.
After that, a draft document will appear on the screen within the plugins' information. Click ‘Run’.
Step 2: Connect your Webflow Account
You'll have suggestions for Figma and Webflow auto layouts. Click the Next button continuously; then, you'll be asked to connect your Webflow account.
Connect your existing account or create a new Webflow account. It's free!
Next, select the Workspace. Then select ‘authorized app’. After this, there'll be a confirmation on the screen.
Step 3: Start the design
Go back to the ‘Figma’ tab. Here, you'll see the Webflow link has already been connected. Tap on the ‘let's started’ button.
When you open the plugin, you'll see a library of pre-made components. Forget about making a design from the Scratch. There's no more hassle now!
Step 4: Use Webflows' Div frames to build the basic foundation
Pick up a Nav Logo on the screen. Next, add the hero section and necessary elements for a complete frame.
Step 5: Open the Webflow App
Jump to the Webflow site tab, select a new site button, and then a blank site. Name your site and wait to create a site.
Step 6: Export design to Webflow
Again, open the Figma tab. Just choose the Webflow site from the plugin page, where the designs from Figma are to be shifted.
You'll see the ‘Copy to Webflow' option below. Click it on and select ‘Copied to Clipboard'. Now, press Command+V to paste the selected section.
Here you go! Follow this process to copy and paste other components and variables and get a successful export.
Step 7: Go to mobile
Ensure Responsive Webflow Design with the mobile icon option on the top bar screen. Check if it's responsive across all screen sizes.
Step 8: Customize, test, and publish
You've only got the basic foundation of your website. Use global styling to customize the heading, font, paragraph, color, and necessary elements. Next, add animation for a better user experience and bring life to your website.
Next, test whether everything is going perfectly to launch your first webflow website. Conduct a trial of how it looks when live.
Congratulations! You already know the process of how to convert Figma to Webflow!
Launch your new website!
Ready to Convert Figma to Webflow?

Wait! What we already discussed above is the basic Webflow foundation from Figma design. That will not eventually work for your web development project.
So, do you want a fully functional and dynamic Webflow website? ideapeel will help you out.
ideapeel as a Webflow expert agency, helps you transform Figma design into a realistic Website with seamless animation and custom templates integration.
Our Webflow designer ensures that your website is visually stunning, responsive, and fully SEO optimized– that actually works!
What to find else?
Partner with ideapeel and let us handle the complex migration seamlessly –cheers to a smooth transition!
FAQs
Can I export from Figma to Webflow?
You can export Figma to Webflow with a plugin by Webflow Labs by following a a few steps. These are-
- Run the Figma to Webflow plugin on your screen.
- Connect to your Webflow account and go back to the Figma tab.
- Use Webflows' Div frames to build the basic foundation.
- Open the Webflow App and create a new site.
- Export design to Webflow
- Ensure Responsive Webflow Design
- Customize, test, and publish
Can Webflow integrate with Figma?
Yes, Webflow can integrate with Figma within a plugin. Just go to the Figma Community tab. Search for Figma to Webflow plugin. Next, run it. It'll act as a bridge between two platforms. You can easily export the figma design to Webflow.
Is it better to design in Figma or Webflow?
Figma is popular for creating designs or prototyping. You may turn this static Figma design into an interactive website design in Webflow. So, depending on your project, the decision between Figma or Webflow, it may vary.
Final thoughts
If you are primarily familiar with Figma, converting it into Webflow can be slightly challenging.
There are a few differences in features between Figma and Webflow. So, getting a basic concept of Webflow workflow and features will help you to stay ahead.
One more thing: Your Website is your credentials. So, don't let it seem unprofessional! Take the help of experts to build a stunning and responsive website that aligns with your business. Here, consider ideapeel and make a schedule today!
Enter your website URL to receive a detailed website analysis report in just 5 minutes!
Want to discuss your project?
Grow your project with Webflow Experts
Related Articles
SaaS website migration is a technical process that focuses on preserving SEO, avoiding broken links, managing integrations, and ensuring security compliance for B2B and enterprise SaaS businesses.
You may fear losing search rankings, experiencing a drop in user subscriptions, or losing critical CMS data.
This guide explains an SEO-safe WordPress to Webflow migration, common mistakes to avoid, and a clear Webflow checklist. So your SaaS site can move safely while gaining speed, scalability, an easy CMS, and full design control.
What is SaaS Website Migration
SaaS website migration is the process of moving a SaaS marketing website from one CMS to another while preserving SEO ranking, custom integration, and data security.
SaaS websites are different from standard marketing sites. Because they support demos, sign-ups, content hubs, and product-related workflows.
For B2B SaaS teams, WordPress to Webflow migration is the most common upgrade.
Due to better performance, fewer plugins isssues, and easier content management for marketing teams, B2B and enterprise SaaS choose Webflow over WordPress.
How to Prepare for SaaS Website Migration

Before migrating to a Webflow CMS, it's important to plan SaaS migration strategies.
Preparing for a SaaS website migration requires auditing all pages, identifying SEO-critical assets, documenting integrations, backing up data, and defining clear post-migration KPIs.
Without this preparation, SaaS companies risk SEO losses, broken workflows, and reduced conversions.
1. Audit your Current SaaS Site
Use SEO tools like Screaming Frog, MOZ and run a crawl of your domain.
This crawl gives you a list of all the pages of all the sites that exist on your domain, like:
- Blog Posts
- Landing Pages
- Media and Images
- PDF and downloadables assets
Export all crawl data into a Google Spreadsheet. This document becomes your migration blueprint and prevents missing important pages during the transition.
2. Identify Core SaaS Functionality and Workflows
SaaS websites often contain critical workflows that support revenue and user acquisition. These must be documented early to avoid functional gaps after migration.
Pay special attention to:
- Product dashboards and logged-in experiences
- Subscription flows and pricing logic
- Demo, trial, and contact forms
- Gated content and lead capture mechanisms
3. Markdown SEO Pages
Highlighted each product page and blog page that has high authority for SEO. Because you don't want to lose SEO ranking, traffic and constant leads of those pages.
Use Google Search Console and Google Analytics to identify pages with:
- High impressions and clicks
- Strong keyword ranking
- Existing backlinks
- Consistent lead generation
Double-check with pages with SEO keyword tools like Semrush and Ahrefs.
4. Back Up the Full Website Data
Ensure you have a backup of the existing WordPress site, all data, and plugins are securely backed up.
Your backup should include:
- Website files and databases
- Plugins and configuration
- Images, videos, and media assets
- User data and form submissions
- SEO elements such as titles, meta descriptions, redirects, and anchor text
5. List Custom Integration and Tool
Thinks what the tools, CRM integration, and SaaS data need to migrate or rebuild in Webflow.
Create a detailed list of:
- CRM systems (HubSpot, Salesforce, Pipedrive)
- Payment gateways (Stripe, Paddle)
- Authentication systems
- Analytics and tracking tools
- API connections and third-party services
Documenting dependencies helps ensure all integrations are rebuilt or connected correctly inside Webflow without disrupting functionality.
6. Sets Clear Goals and KPI
Most SaaS website migrations fail without defining a clear result after migration.
Common SaaS site migration goals include:
- Preserving or improving SEO rankings
- Increasing demo or free trial sign-ups
- Reducing friction in user journeys
- Improving site speed and performance
- Simplifying CMS management for the marketing team
- Reducing reliance on developers for routine updates
Translate these goals into measurable KPIs, such as:
- 20% increase in organic rankings within 60 days
- Reducing page load time from 5 seconds to under 2 seconds
Track KPIs before and after migration for performance review
Bonus: Download the WordPress to Webflow Migration checklist, including how to handle redirects and SEO.
How to Migrate Your SaaS Website: Step-by-Step Process
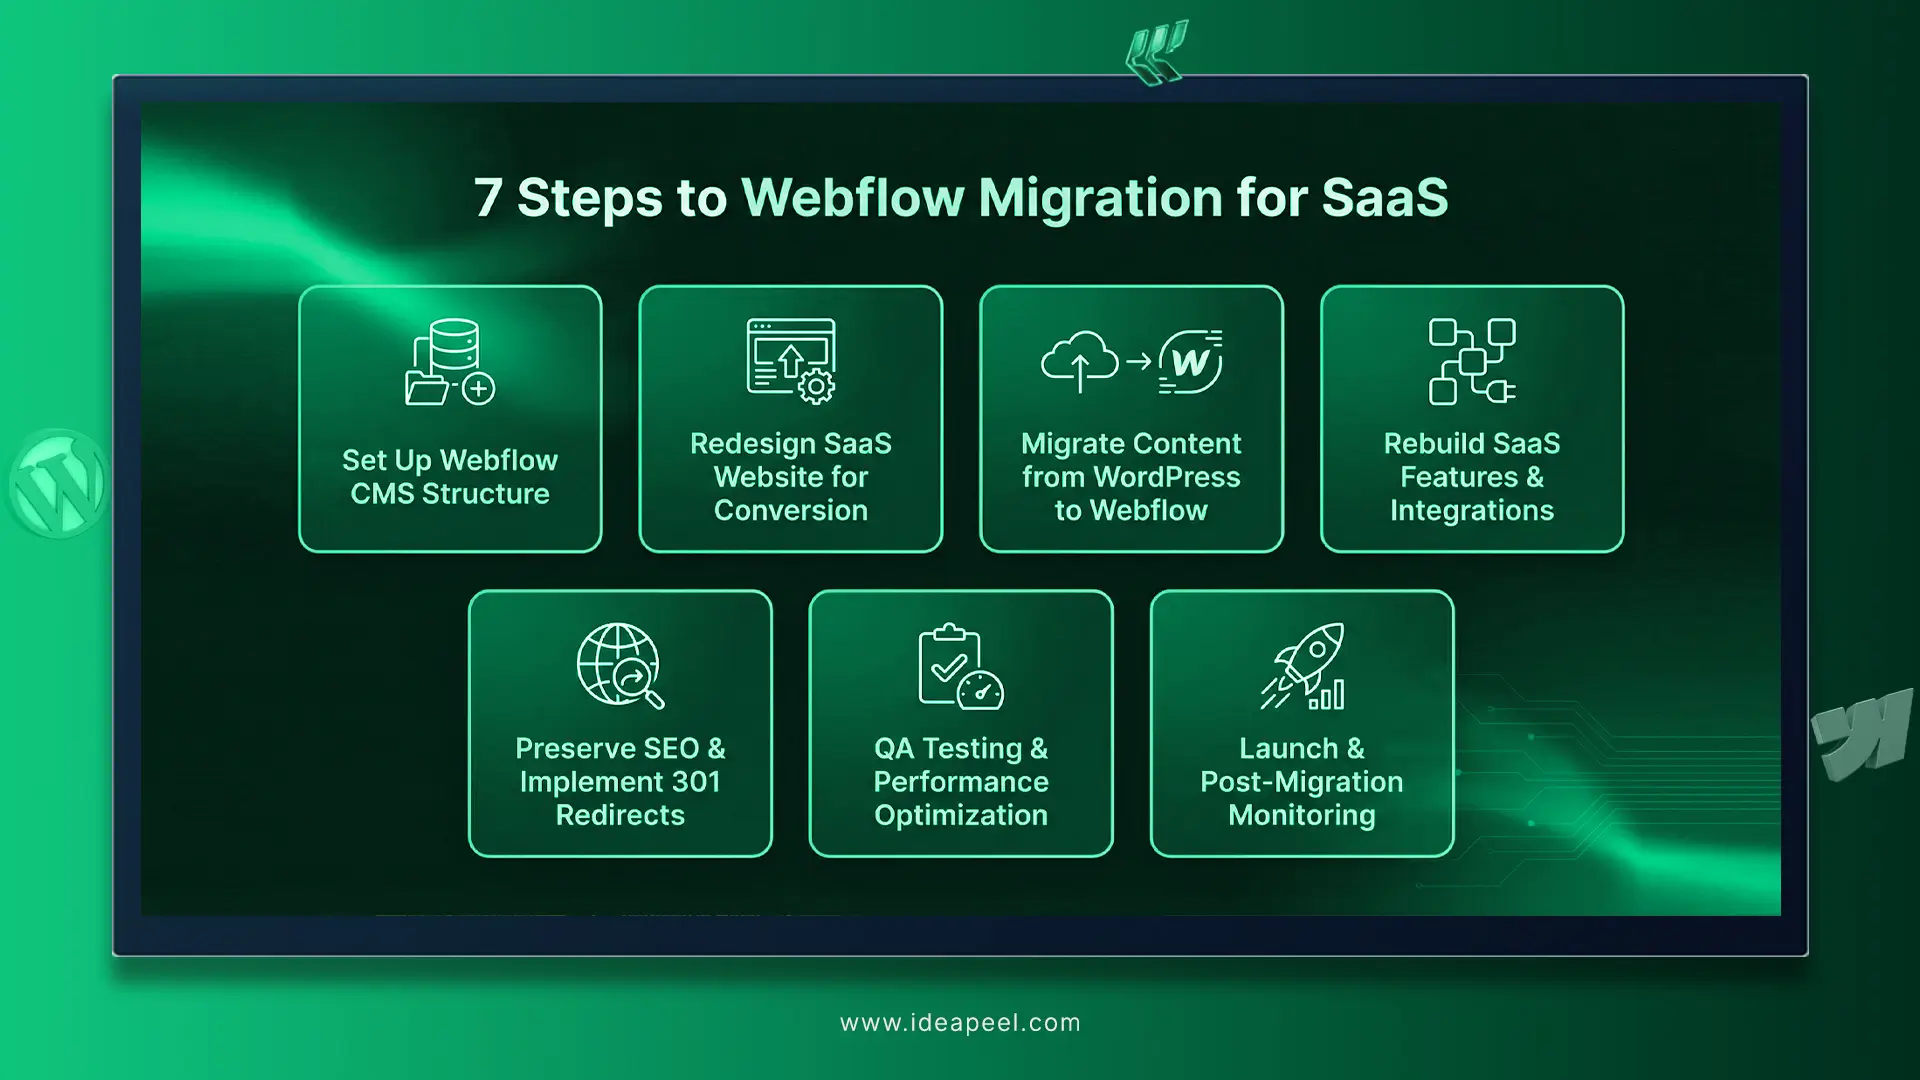
You now have full backup, data, and clear goals for migrating the SaaS Website to Webflow.
Let's break down how Webflow agencies like ideapeel take care of B2B SaaS Webflow SEO preservation when migrating to a SaaS WordPress website.
Step 1: Set up Webflow CMS Structure
Before jumping to Webflow website build, it's crucial to create a CMS collection similar to a WordPress site.
So, your marketing team feels a similar workflow without being overwhelmed. And, it will make the migration process go smoothly without errors or broken links.
Plan collection for blog posts, product pages, resource and landing pages. Define fields for SEO metadata, title tag, meta description, ALT text, and slug.
Step 2: Redesign SaaS Website
Webflow migration is the best time to optimise SaaS website conversion rates, bounce rates, user experience, and SaaS dashboard, subscription flows complexity.
Redesigning an enterprise SaaS marketing site needs scalability in mind, which most developers or agencies skip.
Team ideapeel refreshes or redesigns enterprise SaaS product sites for SaaS provider with conversion mapping and reusable components.
So, SaaS website redesign for startups and especially enterprise companies should focus on conversion, higher subscription and lower churn rates.
Pro Tip: Analyse Google Analytics to identify pages with high bounce rates and redesign them for better engagement.
Step 3: Migrate Content from SaaS WordPress site to Webflow
Export the full WordPress site’s content, like pages and custom folders, with WP All Export. Then download it as a CSV.
Next, import the CSV file into Webflow CMS.
Explore detailed WordPress to Webflow migration steps for a smooth transition.
Step 4: Rebuild SaaS Features and Integration in Webflow
SaaS functionality sign-up/login forms, Subscription flows, dashboards, and user portals need to be carefully rebuilt in Webflow or connected through a secure API.
External services such as CRMs, payment gateways like Stripe or PayPal, analytics, and marketing automation tools are reconnected and tested to work seamlessly with the new Webflow front end.
Test every integration thoroughly before launch.
Step 5: Preserve SEO and 301 Redirect
This is where Webflow migrations either win or crash.
Every old WordPress URL is mapped to its new Webflow version using 301 redirects
SEO titles, meta descriptions, internal links, image alt text, and sitemap structures are transferred into Webflow.
Then, Google Search Console is updated so Google can re-index the site without ranking loss.
Step 6: QA Testing and Performance Optimization
Before launch, the entire SaaS website is thoroughly tested to catch layout issues, broken links, form errors, and legacy systems CMS inconsistencies.
Performance, data migration, security, and responsiveness are optimized to ensure fast load times, strong Core Web Vitals, and a smooth user experience across all devices.
Step 7: Launch & Post-Migration Monitoring
After launch, the site is closely monitored using analytics and SEO tools to track rankings, traffic and user behavior.
Any indexing, redirect, or performance issues are resolved quickly to ensure a stable migration and continuous SaaS website growth on Webflow.
[[inner-cta]]
Enterprise SaaS Website Migration: What Changes?
Migrating an enterprise SaaS website to Webflow goes far beyond design or CMS updates.
Enterprise platforms depend on authentication systems, integrations, and security layers that must remain stable during migration. Webflow typically powers the marketing layer, while critical product logic stays securely in your backend.
SSO and Authentication Flows
Enterprise SaaS sites often use SSO providers like Okta or Azure AD. During migration, login and onboarding flows must continue routing users correctly without breaking access rules.
API and Custom Integrations
Every integration must be audited, reconnected, and tested to ensure forms, demos, and gated content trigger the same backend actions as before.
CDN, Performance and Uptime
Enterprise traffic requires global speed and reliability. Webflow’s CDN improves performance, but migrating to SaaS site still needs traffic testing, uptime monitoring, and a controlled launch plan to avoid disruptions during campaigns or releases.
Security and Certificates
Enterprise-grade security certificates for SaaS vendors are crucial.
SSL, subdomains, security headers, data security and regulatory compliance must be preserved. Webflow should be configured to match existing enterprise security standards, not simplify them.
Common Mistakes to Avoid When Migrating a SaaS Website to Webflow
Common mistakes include ignoring SEO, overcomplicating with code, skipping scalability, breaking integrations, and launching without proper testing. Here's some best practices for successful migration.
1.Rebuilding the WordPress Website Entirely
Most Agency or freelance web developers directly jump to Webflow and recreate your WordPress site entirely in Webflow.
They don't care about how your SaaS website functions, workflows, or CMS logic.
These common scenarios often drop off ranking, broken links, SaaS integration, CMS complexity after migration.
As a result, your marketing teams are frustrated when adding content, small updates and you blame the Webflow migration.
Solution: Hiring a B2B SaaS Webflow Agency is the solution to a smooth transition.
2. Overengineering with Custom Code
You don't want a complicated Webflow CMS after escaping from plugin headaches, right?
But, some developers often overuse Webflow design with custom code, code embed and workarounds.
And, here you need constant help from the developer for small updates, edit needs.
So, ask a question first– Will this website be fully editable with my non-technical marketing team after migration?
Solution: A good SaaS Webflow web development will ensure reusable components, a clear CMS structure, more scalability, and an easy-to-manage CMS for your SaaS marketing team
3. Ignoring Scalability
Skip the building style guide page in Webflow is terrible for continuous Q and A
Without a proper design system, every new page structure got overwhelmed.
You can't find out the right size font, button colour, or CTA alignment. This inconsistency slows down your landing page, or the copy requires design Q&A.
Solution: Ask for a reusable component UI for Navigation Bars, footers, CTAs and sections.
4. Not Accounting for SaaS Integrations
Many developers rebuild the site but break or oversimplify integrations, causing data loss or funnel gaps.
Then sales teams ask: Why have leads stopped syncing?
A SaaS website is deeply connected to CRMs, analytics tools, onboarding flows, email automation, and lead tracking systems.
So, overlooking SaaS integration is a major mistake during the migration process.
Solution: Rebuild and test each integration in Webflow staging, not production. Submit test leads and verify data flows correctly into your CRM and analytics dashboards before going live.
5. Launching without a Post-Migration Plan
Launching the site without a post-migration validation plan creates long-term friction.
Many agencies consider the job done once the site goes live, without thorough QA, performance monitoring, or documentation.
How Much Does SaaS Website Migration Cost?
SaaS website migration typically costs $2,000–$20,000, depending on the SaaS company's stage, complex SaaS websites, custom integration complexity, enterprise security requirements, and CMS structure.
Startup SaaS Website Migration Cost: $2,000–$4,000
- Basic CMS setup and content migration
- Light redesign or template-based build
- Essential SEO preservation and redirects
- Few or no custom integrations
Mid-size B2B SaaS Website Migration Cost: $5,000–$8,000
- Blog, resources, and multiple landing pages
- Custom CMS structure for marketing teams
- SEO-safe migration to protect rankings
- CRM, analytics, and marketing tool integrations
- Conversion-focused redesign
Enterprise SaaS Website Redesign+ Migration Cost:$8,000–$12,000+
- Large CMS collections and complex page types
- Custom integrations, APIs, SSO or auth flows
- Enterprise security and performance requirements
- Phased migration with staging and QA
- Post-launch monitoring and optimisation
Ready to Migrate Your SaaS Website?
SaaS website migration requires technical expertise rather than just redesign or development tactics.
Even small migration mistakes can disrupt team workflows, compromise user data, or cause a complete SEO drop.
That's why having a Webflow migration agency with hands-on experience in SaaS and enterprise-grade websites is essential.
You can choose ideapeel, trusted by 50+ B2B SaaS companies.
ideapeel , a Webflow agency for B2B SaaS, provides Webflow website design, redesign, and migration services.
So, ideapeel team can ease your migration headaches without causing SEO drops, loss of technical credibility, or integration issues.
Reach out to us. And, get your free customize Webflow migration checklist and cost estimate today.
[[last-cta]]
Webflow templates are revolutionizing web design in 2026. They offer an easy way to create stunning websites without coding.
You shouldn’t need to learn programming to bring your business online. Website builders now empower anyone to build a professional site quickly, affordably, and with total control.
Whether you're a doctor, a Lawyer, or a business owner, Webflow templates cater to your needs. They offer a range of designs tailored to various industries.
In 2026, both free and premium templates will be available. Free templates are perfect for beginners or small projects.
Premium templates come with advanced features and dedicated support for startups and businesses.
So, in this guide, we will explore the Webflow template that takes you from zero to hero. And also give different suggestion templates for you that will be helpful to you.
What is a Webflow template?
A Webflow template is a pre-designed website layout that can be customized using Webflow’s editor and is easy to use. It can easily build a professional, delightful website quickly without coding.
Purpose
- Fastly ready a site without hassle
- Maintain design consistency
- Focus on content and branding rather than starting from scratch
Types of Webflow Templates
- Free Templates: Simple, beginner-friendly, ideal for small projects or MVPs
- Premium Templates: Feature-rich, customizable, include support, suitable for startups, SaaS, and businesses
Best Uses / Applications
- Startups & SaaS products
- Portfolios & personal websites
- Agencies & creative studios
- E-commerce and product showcases
Why Choose Best Webflow Templates in 2026?
Webflow templates are incredibly popular in 2026 for many reasons. They simplify the web design process, offering stylish and functional solutions that require no coding.
Choosing Webflow templates allows for real-time design changes with its visual editor. This feature enhances creativity and flexibility, catering to your unique brand as needed.
Benefits of Webflow Templates:
- Responsive and mobile-friendly designs
- SEO-optimized system & Features
- Customizable with a drag-and-drop interface
- Don't need hassle for coding
Webflow ensures that your website not only looks good but also performs efficiently across devices. With consistent updates, templates stay relevant, adapting to new web standards and innovations.
Example of Best Free and Premium Webflow Templates 2026: Top Picks
1. Iftech – Technology Website Template
.webp)
Price: Free
URL: Iftech Webflow Template
Overview:
Iftech is a professional Webflow template designed for startups and tech. It helps showcase applications, attract users, and provide a seamless browsing experience across devices. Fully responsive and optimized for mobile, tablet, and desktop.
Key Features: free Webflow template
- Fully responsive across all devices
- Smooth animations and interactive elements
- Easy customization without coding
- Good user experience and Webflow CMS
Pages Included:
Home, Style Guide, Custom 404 Page, Licenses
Why Use It:
Perfect for tech startups needing a standout website, good for conversions, and fast, user-friendly performance.
2. LawX – Professional Services Website Template
.webp)
Price: Free
URL: LawX Webflow Template
Overview:
LawX is the free Webflow template for Legal Practitioners. This template is perfectly made for showcasing your service, portfolio, and case results. and a fully responsive design, ensuring your website looks flawless on desktops, tablets, and mobile devices.
Key Features:
- Fully responsive design for all devices
- Easy-to-update CMS for content management
- Elegant layout tailored for legal services
- Smooth animations to enhance user connection
- SEO-friendly structure
Pages Included:
Services, Team, Case Results, Home, About
Why Use It:
LawX is ideal for legal professionals seeking a credible, modern online presence that fosters trust with potential clients.
3. Arvora – Environment & Sustainability Website Template
.webp)
Price: Free
Overview:
Arvora is a Webflow template focused on eco-friendly businesses, renewable energy companies, and sustainability-focused organizations. Its clean and modern design allows companies to highlight projects, services, and missions while keeping visitors engaged with user-focused design and responsive layouts.
Key Features:
- Modern, eco-friendly design
- Fully responsive on different devices
- Smooth animations and interactive elements
- SEO-optimized and performance-ready
- Easy no-code customization
- Free Figma file included with it
Pages Included:
Home, About, Service (CMS), Service Details (CMS), Blog (CMS), Blog Details (CMS), Contact, Tag (CMS), Category (CMS), Style Guide, Licenses, Changelog, Search Results, Protected Page, 404
Why Use It:
Arvora is perfect for green businesses like sustainability, natural resource optimization, and also for renewable companies that want to showcase their work.
[[inner-cta]]
4. Reliacare – Wellness & Medical Website Template
.webp)
Price: $99
Explore Now : Reliacare Webflow Template
Overview:
Reliacare is a professional Webflow template built for clinics, medical centers, wellness providers, and healthcare startups. It combines a clean, trustworthy design with structured layouts, making it easy for patients to find the information they need.
Key Features:
- Fully responsive and mobile-friendly
- Clean healthcare aesthetics
- CMS-powered blog and services
- Modular UI components for flexible layouts
- Easy no-code customization
- Smooth animations and interactions
- SEO-optimized
- Clear typography for accessibility
- Free Figma file (upon request)
Pages Overview:
- Static Pages: Home, About, Services, Service Details, Doctors, Doctor Profile, Pricing, FAQs, Contact, Style Guide, Licenses, Changelog, 404 Page
- CMS Pages: Blog, Blog Post Template, Services Template
Support: Email ideapeel@gmail.com for assistance or to request the free Figma file.
5. FundMate – Technology & Startup Funding Template
.webp)
Price: $99
URL: FundMate Webflow Template
Overview:
FundMate is a bold and modern template for startup funding platforms, venture capital firms, and accelerators. It blends authority and energy, helping founders and investors connect seamlessly.
This template helps startups grow with simple sections for funding, mentors, partners, reviews, and a built-in blog.
Built-in Features:
- 20+ polished pages & 50+ modular sections
- Funding program overview & portfolio layouts
- CMS blog & case studies
- Fully responsive design
- SEO-optimized with fast-loading animations
- Global styles and reusable components
- Free editable Figma file
Support: Contact ideapeel@gmail.com for assistance or to receive the Figma file.
6. Relatik – Technology & SaaS Website Template

Price: $99
Best for you : Relatik Webflow Template
Overview:
Relatik is a fully user-focused Webflow template designed for SaaS startups, CRM platforms, and tech-driven businesses. It combines clean visuals, storytelling, and conversion psychology to make your product instantly understandable.
Includes CMS-powered blog, Clean visual, testimonials, integrations page, and e-commerce shop.
Key Features:
- CMS blog, testimonials, product pages
- Fully responsive
- E-commerce-ready layouts
- Free Figma file
- Global style guide and organized class system
- Smooth GSAP-style animations and transitions
Perfect for: SaaS startups, CRM tools, productivity platforms, AI software, B2B tech brands
Support: ideapeel@gmail.com
7. Metrocard – Fintech Website Template

Price: $29
Try it now: Metrocard Webflow Template
Overview:
Metrocard is a sleek finance webflow template with a single-page design that controls smooth navigation and interactive components. Perfect for finance startups or banking type company.
Key Features:
- Intuitive class naming
- Webflow-optimized
- SEO-ready
- Easy to customize
- 100% Mobile Responsive
Pages Included: Home, Style Guide, Licenses, Changelog, 404 Not Found, 401 Protected Page
Support: Contact ideapeel@gmail.com
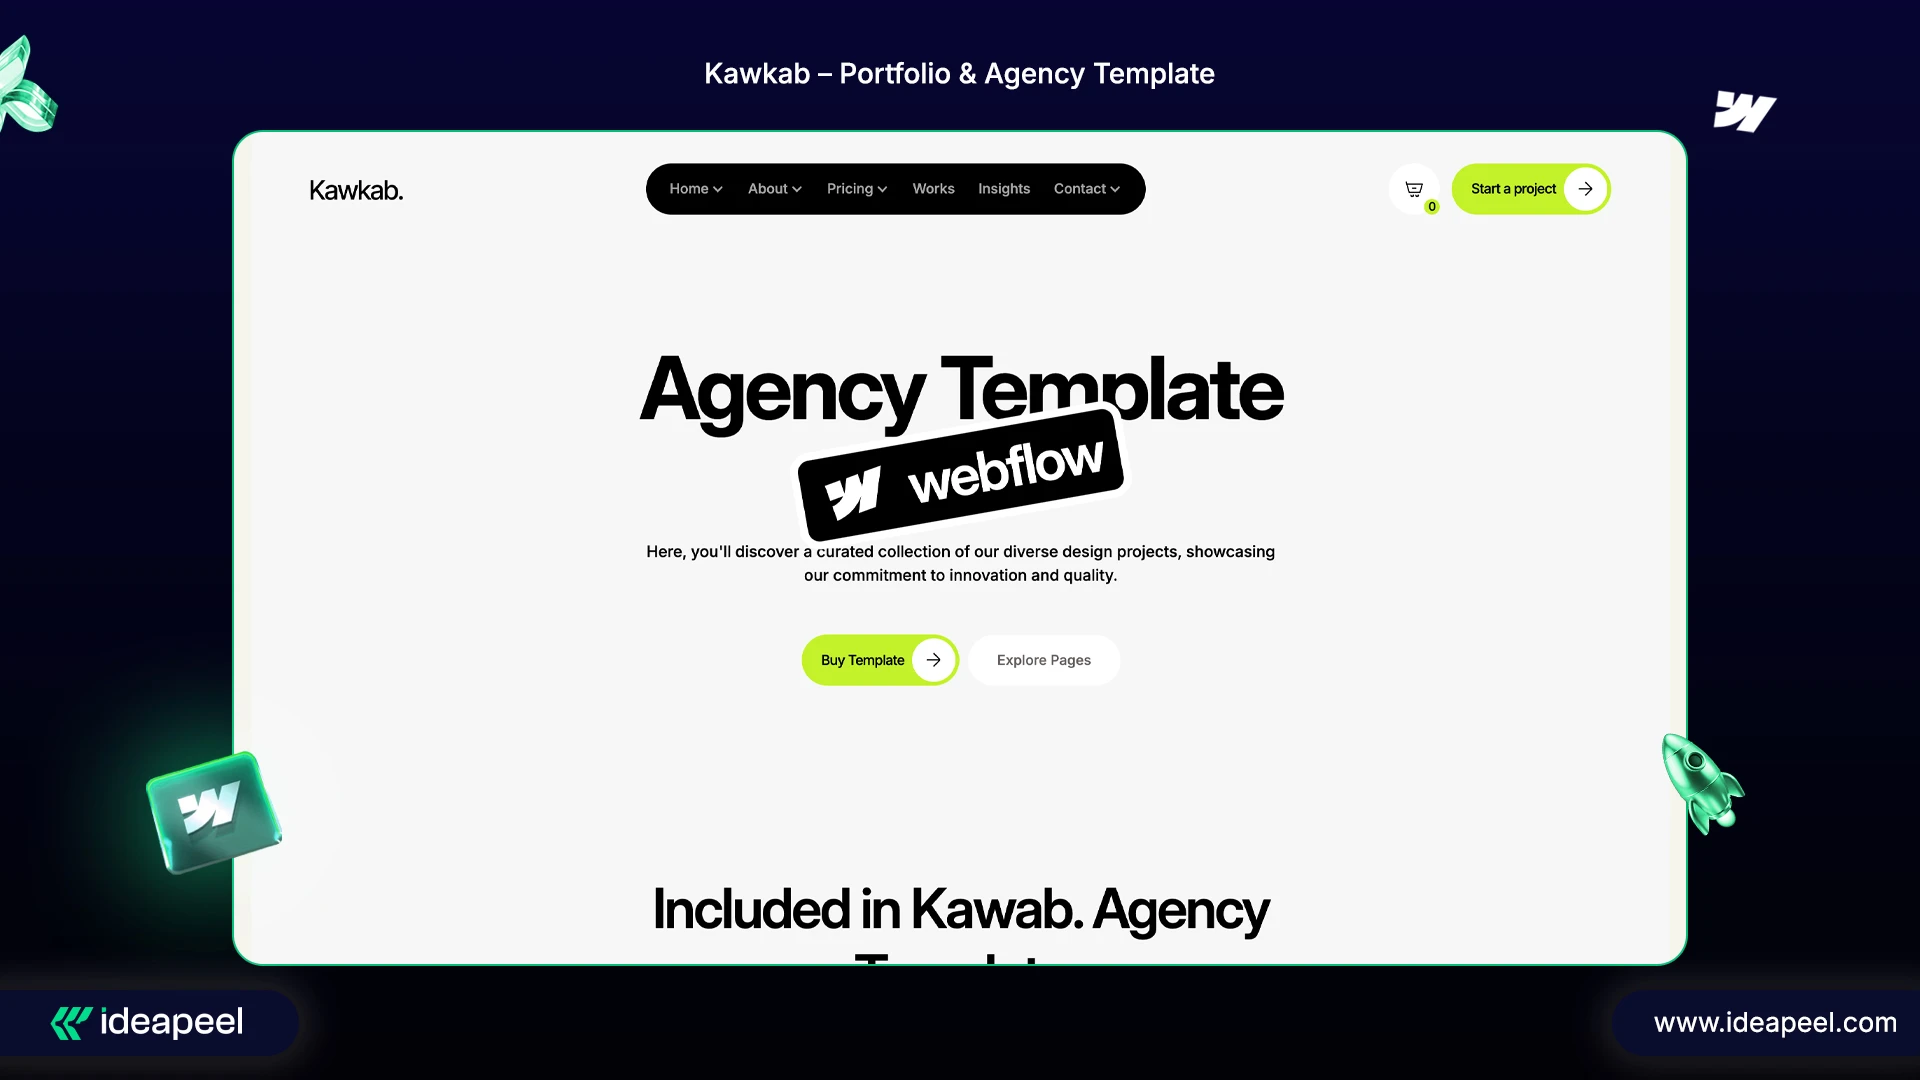
8. Kawkab – Webflow Portfolio Template
Price: $129
Best for you: Kawkab Webflow Template
Overview:
Kawkab is designed for digital agencies and creative studios. It combines multiple homepages, about, pricing, and blog layouts, allowing agencies to showcase their work and attract clients efficiently, making it best for conversion.
Key Features:
- Versatile homepage layouts
- Multiple About Us and customizable Pricing pages
- Career and e-commerce pages included
- Fully responsive and SEO-optimized
- High-performance ui/ux interection
Pages Included: Homepage (3 layouts), About Us (3 layouts), Pricing (3 layouts), Contact (3 layouts), Blog, Career, Shop, Product Details, Checkout, 404, Style Guide, Licenses, Changelog, Cookies Policy, Privacy Policy
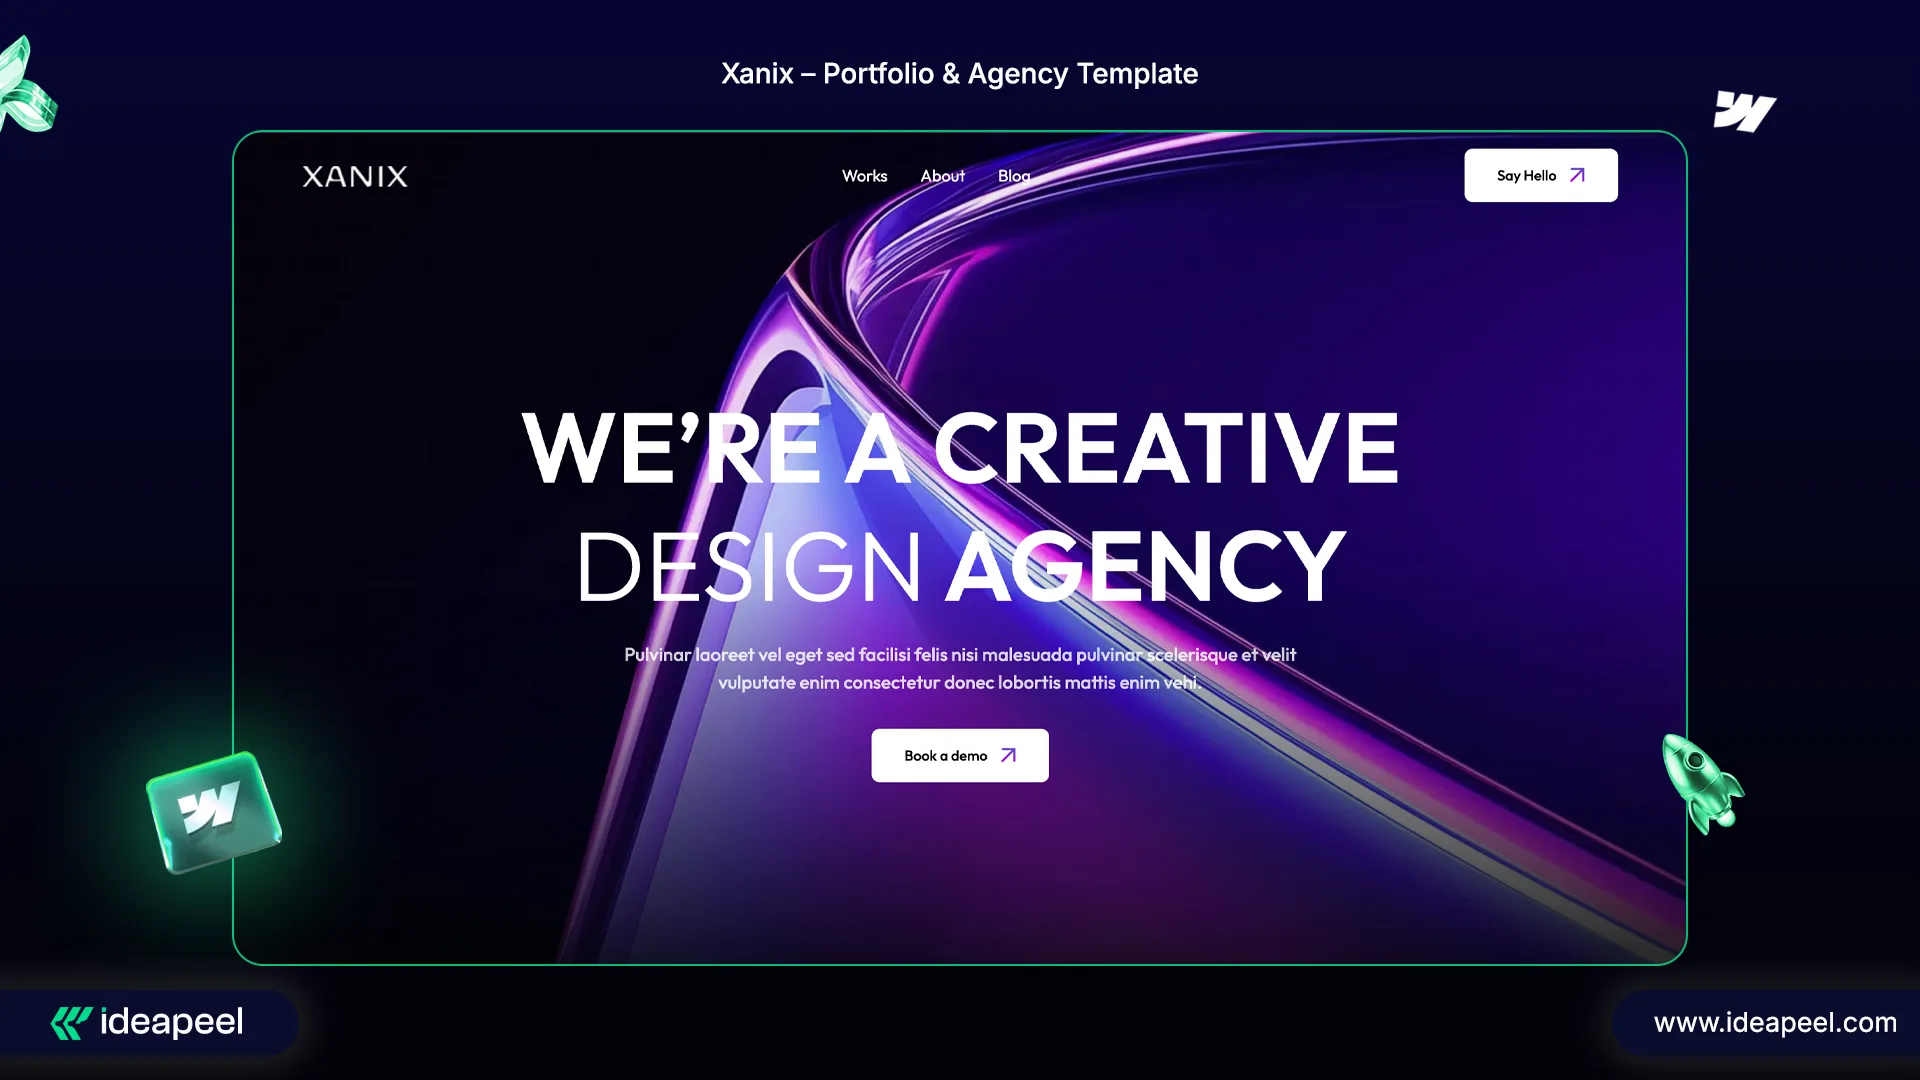
9. Xanix – Portfolio & Agency Template
Price: $49
Try now : Xanix Webflow Template
Overview:
Xanix is a professional portfolio webflow template for digital agencies. It combines creative design with fully responsive layouts and Webflow CMS collections for teams, services, projects, and blogs.
Key Features:
- Creative, user-friendly design
- Fully responsive and retina-ready
- Customizable without coding
- SEO-optimized and fast-loading
- Smooth animations
Pages Included: Homepage, About Us, Services, Works, Blog, Contact Us, 404, Style Guide
Support: ideapeel@support.com
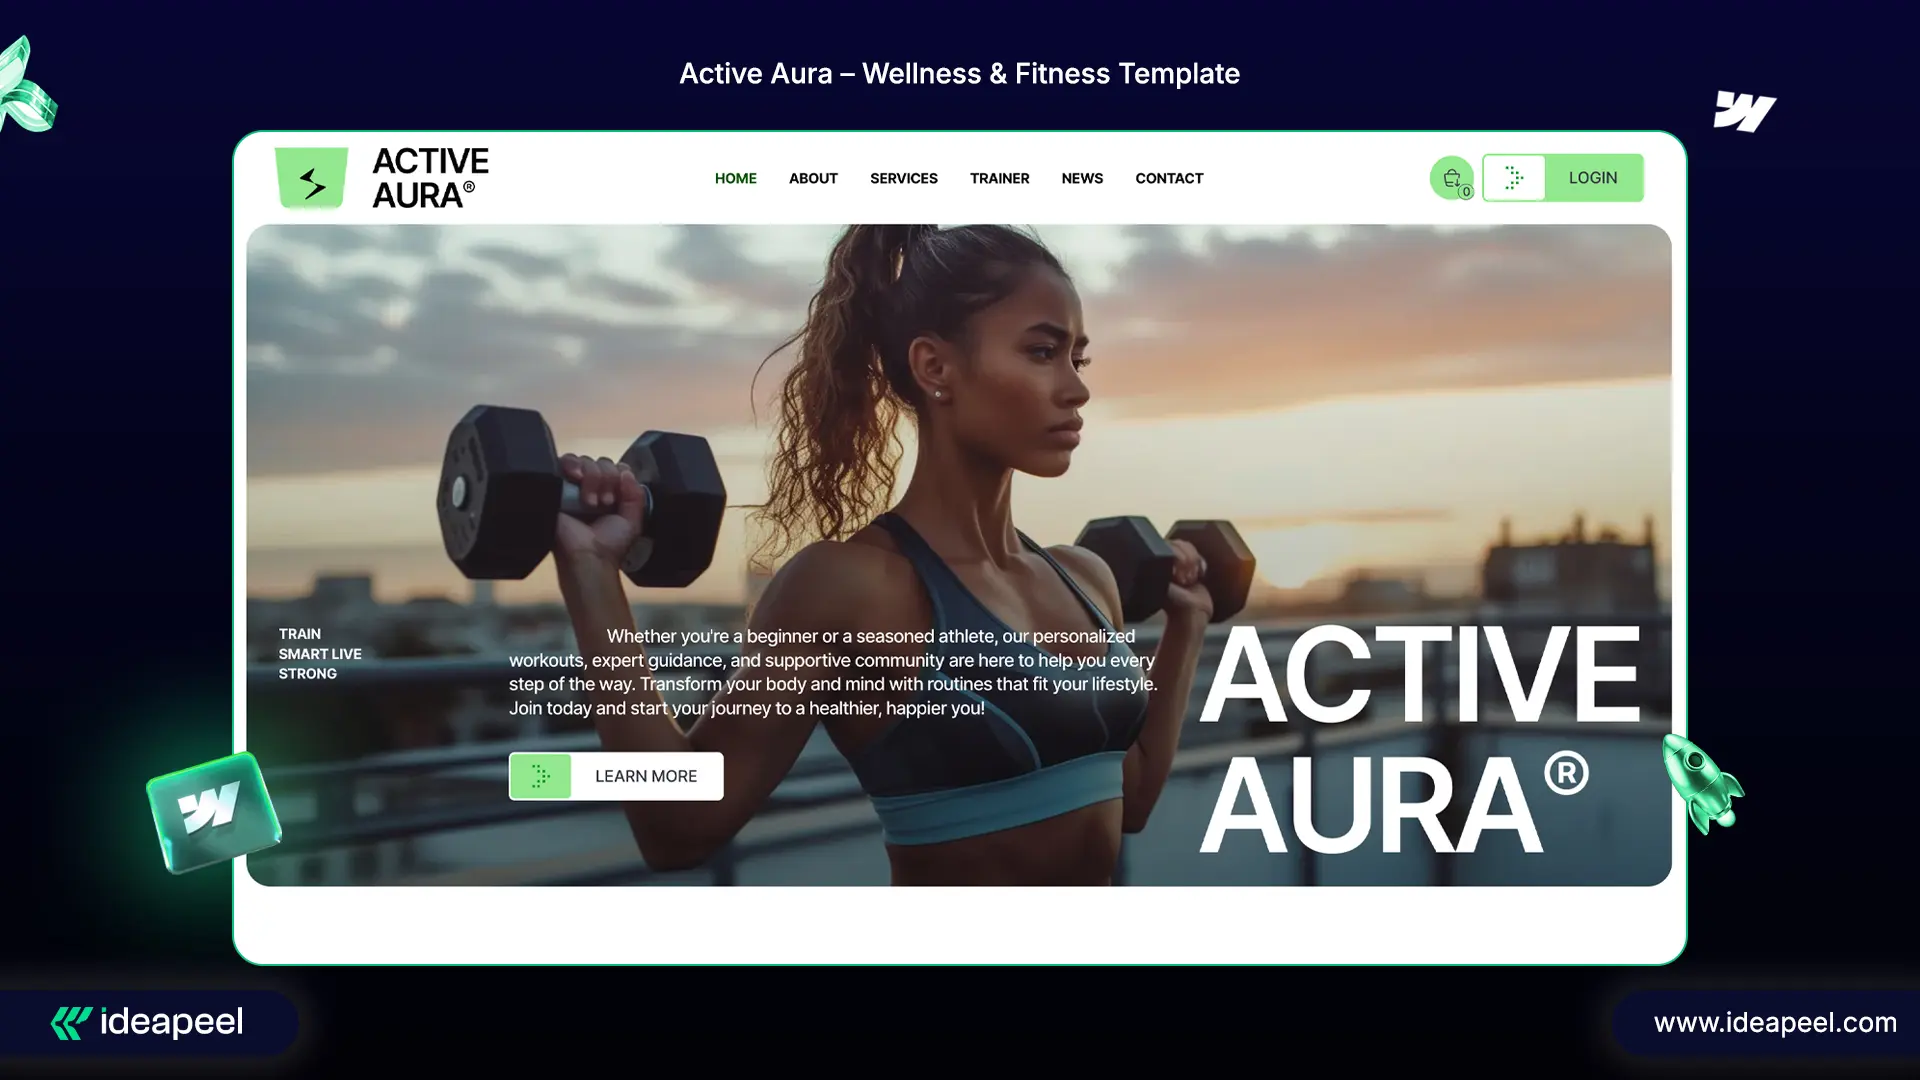
10. Active Aura – Wellness & Fitness webflow Template
Price: $79
Explore Now : Active Aura Webflow Template
Overview:
Active Aura is perfect for gyms, fitness trainers, and wellness coaches. It highlights services, trainers, and fitness programs with a modern, sleek design. Fully responsive and SEO-optimized, it ensures a seamless experience on all devices.
Key Features:
- Fresh and modern layout
- Fully customizable
- Mobile-first and responsive
- High performance and SEO-ready
- Free support (Contact Now)
- Retina-ready
Pages Included: Home, About Us, Services, Trainer Profiles, Blog, E-commerce, Checkout, User Accounts, Privacy Policy, Terms & Conditions, 404, Style Guide, Instructions, Licenses, Changelog
Support: Email ideapeel@gmail.com to request the Figma file or assistance.
11. Quickshift – Transportation Webflow Website Template

Price: $79
URL: Quickshift Webflow Template
Overview:
Quickshift is a modern Webflow website template that helps businesses effectively showcase services, vehicles, routes, and booking options. Fully responsive and optimized for user experience, Quickshift ensures your website performs seamlessly on all devices.
Key Features:
- Mobile-first, fully responsive design
- Clear layout for service and logistics
- CMS-ready pages for easy content updates
- Smooth interactions and animations
- SEO-friendly module and blog page
Pages Included: Home, Services, About, Contact, Blog, FAQs, 404, Packages.
[[question-block]]
12. Dwellis – Real Estate Webflow Template

Price: $169
URL: Dwellis Webflow Template
Overview:
Dwellis is a premium template for real estate teams, property managers, and multi-property portfolios. It includes 23 pages and multiple layouts, making it easy to feature apartments, complexes, floor plans, and neighborhood insights.
Key Features:
- Fully responsive and retina-ready
- 100% customizable with Client-First methodology
- SEO-optimized for higher rankings
- CMS-powered listings and services
- Figma file included for full design customization
- Fully Responsive & Retina Ready
Pages Included:
Home (3 layouts), Contact (3 layouts), Property Details, About, Blog, Blog Post, Leasing Info, Services Shop, Service Details, Terms & Conditions, Sign In/Forgot Password, Apply Now, 404.
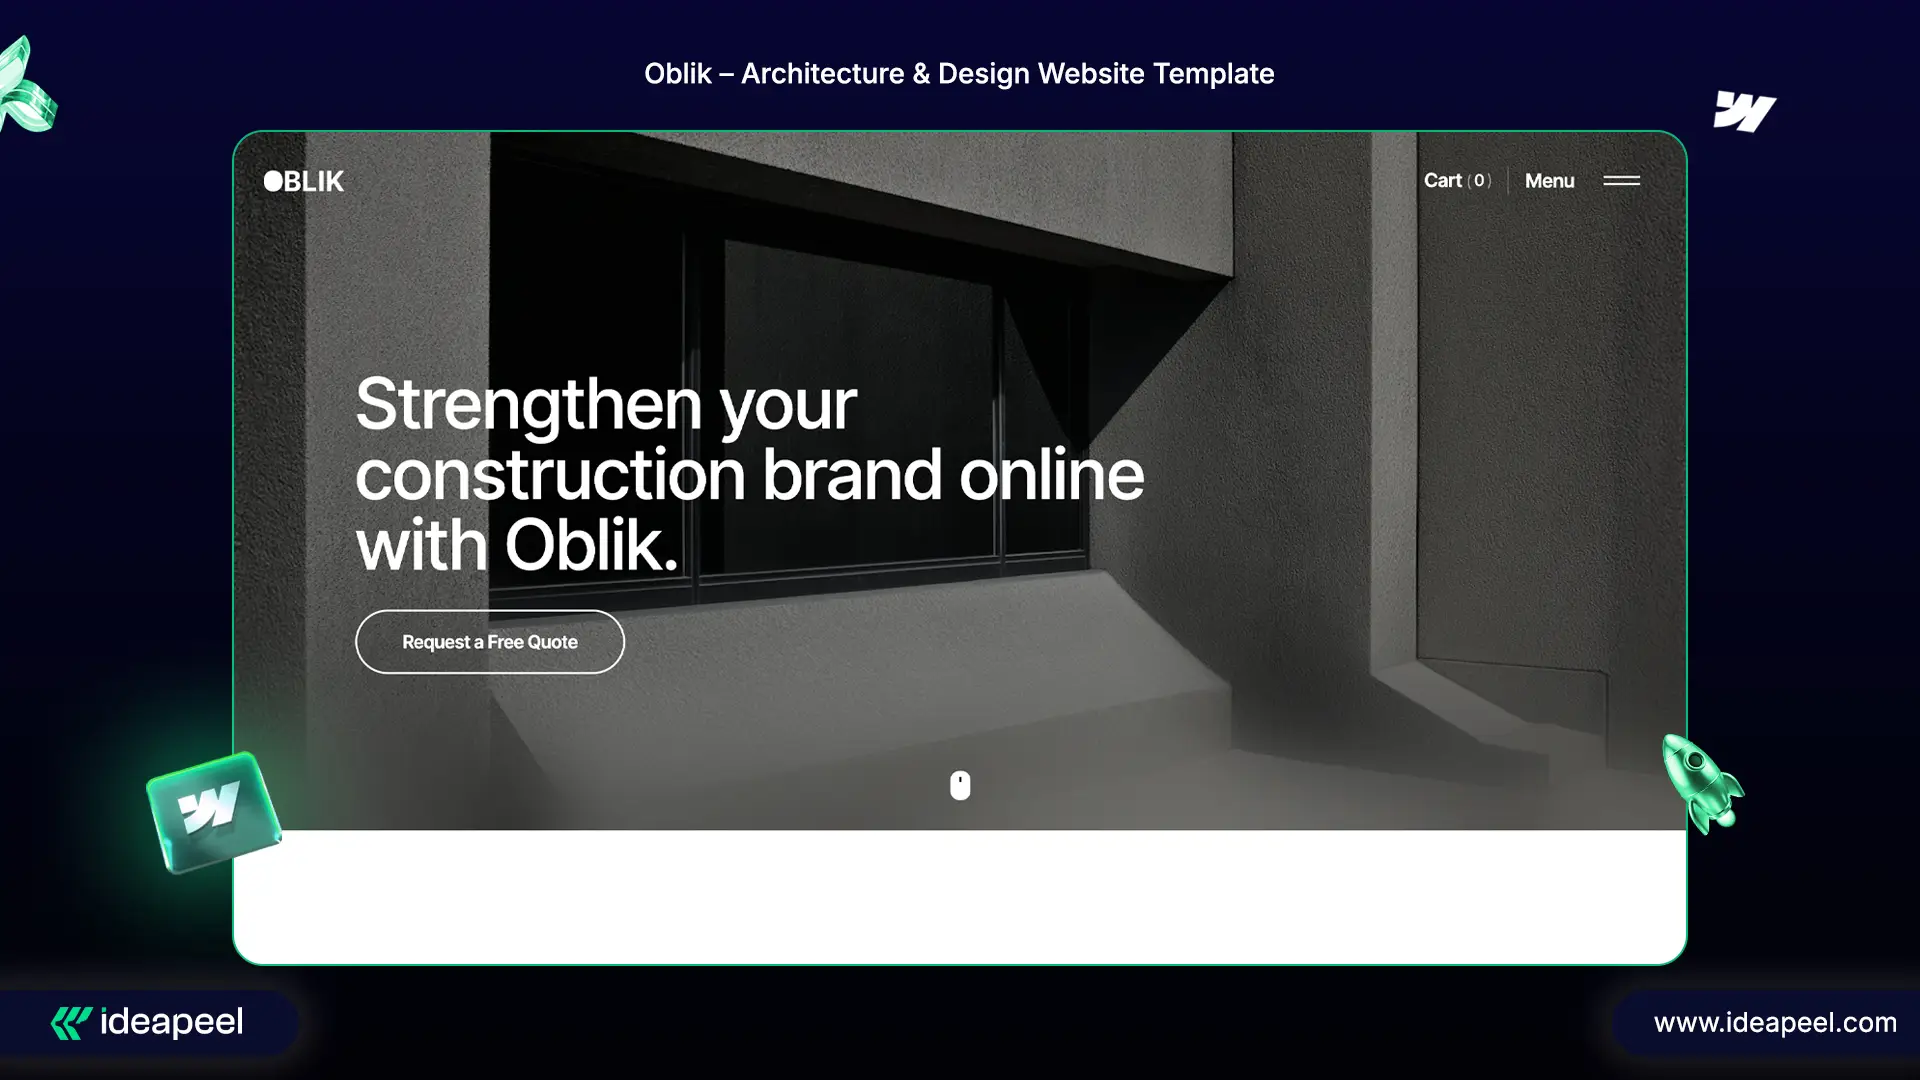
13. Oblik - Construction Webflow website template
Price: $59
URL: Oblik Webflow Template
Overview:
Oblik is designed for architects, furniture designers, and construction companies. Its flexible CMS project pages, animations, and fully responsive layouts make it easy to showcase portfolios creatively.
Key Features:
- Sticky or dynamic header options
- Creative CMS project pages
- Customizable contact forms
- Browser compatible (IE11+, Chrome, Safari, Firefox)
- 100% no-code customization
Launch Your Website with the Best Webflow Templates 2026
If you wanted to make a successful website, seo friendly, with a top user experience design that must attract your users. So, thing the long term and future, not just think about the tommorow, the month, and years, think about the long time benfits and future sustainable factors.
Launch a clean, professional web page with ideapeel using ready-to-use Webflow templates, perfect for business websites, SaaS, online stores, and marketing agencies, all built with a minimalist, fully functional design.
Ready to turn a Webflow template into a high-converting website?
Let ideapeel customize it for your brand.
[[last-cta]]
You know, SaaS founders now update their website design frequently to improve conversion, build authority, and deliver a clean UI.
You may feel the same.
But when it comes to B2B SaaS, redesigning a website raises real concerns: data security, migration risks, and conversion drops during the redesign process.
In this guide, you’ll get clear answers to help you decide on a SaaS website redesign with SEO-safe migration, enterprise-grade security, and maximum conversion growth.
Signs Your SaaS Website Needs a Redesign
A SaaS website needs a redesign when conversions drop, demo requests decline, or users bounce due to unclear messaging and poor UX. Here’s when you should consider a redesign:
Your Website Conversions Dropped
No signup, zero conversion rate, and fewer form fill-ups are clear signs that your SaaS website needs a redesign.
Bounce rate increases, and users can't convince or satisfy when landing on your homepage. The reason?
- Hero section doesn't clearly say about your product.
- Multiple CTA confuse users
- Poor social proof display
- SaaS landing page feels trap for the user.
Day by day, your SaaS conversion kills with such small yet costly mistakes.
Your Demo Form Doesn’t Convert Anymore
‘Request a demo page’ can't convert visitors, and you are still hopeful for high ROI?
Fixing the demo form isn't a solution. You need to redesign the overall website ICP, messaging and branding elements to keep it direct, simple and easy for users.
Your Website UX looks Outdated
Just copying other competitors' websites' UI and look-alikes can't drive B2B SaaS growth.
At the beginning of a SaaS product launch, you may be busy with a fast launch. And, just created a basic SaaS landing page.
What have you got?
- An online presence without conversion
- A digital brochure without targeted visitors
- Displaying SaaS product features without generating subscriptions
SaaS UI/UX design is crucial to improving onboarding user flow and encouraging user experience on sites.
Clear navigation, messaging clarity, mobile-responsive layout, and easy user flow journey are ways to improve SaaS website conversion.
Your Current CMS Isn’t Built for Modern SaaS Growth
Want to scale your SaaS website but with plugin frustration, poor integration or slower site speed? It can't give you the expected SaaS growth.
If your marketing team can't manage content easily or iterate and update anything on the existing CMS, you should migrate platforms and redesign your saas website.
Poor SEO and Speed Performance
Your website loads slowly and thus frustrates users. It not only increases bounce rate, but also affects SEO performance on search engines.
The ultimate goal is to drive traffic to your website and get subscribers. And, here's what you need to boost SEO and add AI schema markup to grow visibility.
Either optimize your site for SEO. Or move to the best SaaS web builder platform for better hosting and SEO built-in features.
Why Webflow is Popular for B2B SaaS Website Redesigns
Most SaaS businesses and founders migrate to Webflow for better enterprise-grade security for B2B SaaS, scalability, SEO features, and better CMS features.
Webflow is the best choice for SaaS product marketing sites. Here's a quick explanation:
- CMS flexibility: Non–technical marketing teams and founders can manage CMS without having a developer.
- Faster iteration and prototyping: Visual drag and drop interfaces without writing a single code.
- Enterprise-grade security for B2B SaaS: Built-in hosting on AWS, automatic updates, SSL, advanced security protocols, and a no-plugin architecture.
- Scalable Infrastructure: Webflow automatically scales server resources without broken plugins, bandwidth limits, or unexpected downtime
SaaS Website Redesign Process: Step-by-Step
Fear of losing traffic or SEO during a redesign? Here’s how a Webflow agency like ideapeel ensures a successful SaaS website redesign while preserving rankings and conversions.
Step 1: Discovery and Research
The first crucial step is to find out about your SaaS product, audience behavior and market fit alignment. And, overall, discussion sessions can bring a successful SaaS website redesign.
- ICP research: Identify your ideal customer profile, pain points, demographics, and user behavior.
- Competitor teardown: Find gaps in UX, UI components, branding, and copy.
- UX heatmaps: Review scroll depth, dead clicks and mapping what’s hurting your SaaS conversion.
- Message-market-fit alignment: Refine the Unique value proposition that clearly communicates with the audience.
Finally, we conduct a SaaS UX audit to clarify which website pages or sections to change. And, schedule a discussion for your open feedback.
Step 2: UX and Wireframe Stage
After an approval, ideapeel starts refining the site or the existing page structure.
- Page-level conversion mapping: User flow journey mapping with conversion in mind
- Content structure for SEO & AEO: Apply Semantic SEO, AEO question blocks and keyword-based content hierarchy.
Step 3: UI and Design System in Figma
At this stage, ideapeel creates the component-based design system in Figma. And it ensures a scalable, consistent visual component across all websites.
- Brand development: brand design, color, typography, and tone across all web pages.
- Component-based design: Reusable components to form molecules, atoms, templates and pages for future updates without the need for a developer.
- Conversion-focused UX: Combine social proof, CTA, demo flows and trial offers to engage visitors.
Step 4: Webflow Development (Enterprise Standards)
ideapeel rebuild SaaS marketing site on Webflow. Basically, Figma to Webflow migration helps maintain enterprise-level standards for performance, scalability and accessibility.
- CMS structure: Dynamic content management for blogs, product pages, and use cases.
- Modular design system: Reusable sections for consistent design and fast iteration.
- Accessibility compliance: WCAG standards for inclusive user experiences.
- Page speed optimization: Lightweight builds and optimized assets to ensure fast-loading, high-performance pages.
Step 5: Webflow SEO Migration
During migration, we ensure B2B SaaS Webflow SEO is preserved. In enterprise-grade SaaS website design, team ideapeel seamlessly migrates your content, sets up redirects, and protects SEO.
Redirect mapping: Implement 301 redirects to preserve link equity and avoid traffic loss.
Indexing and crawl checks: Ensure all critical pages are crawlable and indexed correctly.
On-page SEO validation: Review metadata, headings, internal links, and structured content post-launch.
Step 6:Launch and Performance Setup
Clearly test and iterate any changes with valuable feedback. We set up and integrate GA4,Hotjar and tracking tools to monitor and improve the functionality of SaaS websites.
- Analytics setup: GA4, Google Search Console, and conversion tracking configuration.
- Performance setup: Final speed, responsiveness, and cross-device testing before and after launch.
[[inner-cta]]
SEO and Conversion Preservation Strategies
Webflow SEO migration for SaaS includes backup of full content, metadata, URL, images and transferring it to Webflow.
It’s crucial for enterprise-grade SaaS as well as fast-growing startups. Because migration risk can ultimately drop demo conversion or organic traffic.
Here's a quick checklist for SEO safe SaaS website migration:
- Pre-migration content planning and SEO backup
- Mapping 301 redirect to preserve ranking
- Using AWS migration hub to automate migrating data and content safely.
- Maintain or improve existing SaaS information architecture to avoid SEO and UX disruption.
- Protect demo, trial, and signup flows during redesign to avoid conversion loss.
- Ensure heading structure, content layout, and CMS logic match SEO best practices.
[[question-block]]
How Much Does a SaaS Website Redesign Cost?
SaaS website redesign cost may range between 2k–20k for a marketing site. Again, a fully functional and complex SaaS site with backend development may cost $20k–$40k even more.
Depending on pages, features, integration, SEO, migration and goals, the cost varies.
- Cost for basic update: If you need to customize the template, or a quick conversion fixed site without integration, it may cost $3k – $8k.
- Cost for Growth-focused SaaS site: You need to invest $7k– $15k for full UX, Webflow development, integration and CRO setup
- Cost for enterprise SaaS: Advanced SaaS automation infrastructure, Full SaaS Webflow migration, and custom integration can cost $20k–$40K.
Check our affordable packages for SaaS website design.
B2B SaaS Website Redesign Examples
ZipID: LegalTech SaaS Website Redesign
.webp)
ZipID is an enterprise-grade SaaS Legal Tech App, focusing on compliance-ready security and privacy for the audience.
Redesign Overview:
- Clean and modern UI aligned with legal industry tone
- Clear content hierarchy
- CTA-focused layouts
- Responsive design optimized
- CMS-powered blog, press, and legal policy pages
See the full ZipID website redesign case studies.
Gymstory: Healthcare SaaS App and Web Redesign

Gymstory is a healthcare app, came to us to design an intuitive app dashboard, real-time tracking integration, and members' subscriptions.
Redesign overview:
- Modern app dashboard UI with data-first layouts
- Seamless integration with time-tracking systems
- Membership subscription flow redesign for higher conversions
- Smart fitness offering and pricing page optimization
Explore the Gymstory web redesign case studies.
Famous Tracker: Influencer Time Tracking App

Famous Tracker is a real-time detection app for influencers to track sales and grow their business.
Redesign overview:
- Real-time tracking system integration
- End-to-end SaaS UI/UX design implementation
- Refined brand experience with a modern visual system
- Improved data visualization for faster insights
Explore the Famous Tracker web redesign case studies.
How Often Should a SaaS Company Redesign Their Website?
SaaS companies mainly redesign their website at least between 2-3 years.
Rapidly changing SaaS web design trends, integration capability, SEO opportunity, and SaaS site scalability influence to redesign SaaS website.
Well, minor changes like layout, navigation pattern, site updates, interface color, CMS blog structure are common things SaaS founders take immediately to refresh and improve conversion.
Note: SaaS websites should be monitored at least once every 2-3 months for updates. Or. Sooner or later, if conversions drop, messaging becomes outdated, or the product undergoes significant evolution.
Get Webflow Experts' help for SaaS Website Redesign
You've already got to know why and how your SaaS website redesign should take place to ensure SEO and data security.
Another reminder: Most SaaS founders experience low conversions, slow site speed even loss of ranking.
The reason? Doing redesign with a generic design agency who have less knowledge about SaaS infrastructure, conversion flow, and SaaS UX.
That's why choosing the right Webflow Agency for SaaS website redesign is crucial.
ideapeel is a dedicated Webflow development agency specialized in SaaS software development, SaaS consultation, SaaS website design and migration.
So, there’s no chance of feeling unsafe during SaaS site redesign or migration!
Reach out to ideapeel team and have a successful SaaS website redesign.
[[last-cta]]
Ready to turn your website into a growth asset?


